Showing posts with label hand painted pottery. Show all posts

Saturday, July 9, 2011

Summer Art Camp

The Theme for this weeks art camp ~
Life is Sweet!

Life is Like a Piece of Cake

For the "Life is Sweet" art camp the artists designed their own unique "cookbook" full of delightful recipes for art projects that are almost good enough to eat!  Follow along as the artists discover their tastes for all things sweet in life and have fun with the creative process. Sit back, relax and enjoy.

PROJECT I
Cake Painting Recipe
Ingredients:  16 x 20 inch canvas, pencils, erasers, paint brushes, paint palettes, acrylic paint, cake shape templates, imagination and a sweet dispensation.

 
Step One:  To create a background for your cake, cover the entire canvas with acrylic paint in your favorite color.  This can be done with one color or a combination of colors.  For this project, we just used one.  If you don't want to frame the painting make sure you also paint the sides of your canvas.  Set canvas aside to dry.

 Step Two:  Using your pre-cut cake template, place the largest shape at the bottom of your canvas and trace around it with your pencil.  Follow this by placing the middle and top cake template shapes on the canvas, in consecutive order, and trace around them.

Step Three:  Decorating your cake.  Add design elements by drawing patterns of shape, line and texture.  For a festive touch, add a whimsical cake topper.  Then, go over all pencil lines with a thick black sharpie or marker.
 
Step Four:  Choose your favorite acrylic "Icing" colors and carefully apply them to your canvas. Once your cake painting is finished, set it aside to dry, then go back over all lines with a thick black sharpie or marker.  This last step makes all the design elements "pop" and creates a beautiful piece of art that any cake boss would be happy to display!
PROJECT II
Cupcake Stand Recipe
Ingredients:  Terra cotta pot ~ bottom and saucer, pottery glaze paints, brushes, paint palette, kiln and most import - CUPCAKES!!

 Step One:  Wash off terra cotta pots.  Draw your cupcake stand design on the pot and saucer - remember, your pot will be turned bottom up so draw design accordingly.  Carefully apply the glaze colors to your hand drawn designs.  Cover the pot and saucer with a coating of clear glaze and fire in the kiln.

Make Cupcakes!!!

Everyone gets to help in the kitchen!  From pouring in the cake mix, cracking three eggs, adding 1/2 cup sour cream, and 1 1/3 cups water to mixing the batter. 

The handmade cupcakes look delicious once perched on top of our kiln fired cupcake stands!!

PROJECT III
Apron Recipe
Ingredients:  Pre-washed blank white aprons, black sharpie, acrylic paint, paint palette, paint brushes

 
Since both artists and cooks can always use a really cute and unique apron, we made our own!  A hand drawn rectangle forms a nice clean area in which to create your design - but this is just a preference and one of those "ingredients" that can be tweaked to meet your individual tastes.   We found pencil lines hard to see, so the artists drew their designs with a sharpie, then added color with acrylic paint.  To set the hand painted design, you can either dry the apron in a dryer, or run a hot iron over the back side of the design.

PROJECT IV
Pottery Ice Cream Cup Recipe
Ingredients:  bisque ice-cream cup and spoon, pottery glaze, paint palettes, paint brushes, kiln

This is a pretty easy project that produces wonderful results.  Paint the bisque shapes with various colors of lead-free, non-toxic pottery glaze, then fire in a kiln.  Once finished, fill with ice cream and enjoy!

Recipe for an Art Show
Ingredients:  Art work, artists, proud parents, proud aunts and siblings


 Recipe for a wonderful, creative week:  A group of fun, talented artists mixed together with a supply of awesome art projects and topped off with proud art patrons.  Simply divine!

Saturday, June 18, 2011

Tableware for Summer Parties

Surfers Beach Plate Collection
BRAND NEW FOR SUMMER TABLE DECOR, BEACH PARTIES, AND BEACH WEDDINGS

  Surfers Beach Dinner and Salad Plates

A collection of hand drawn and painted surfers road trip dinner and salad plates that I designed for lovers of summer, surfing, and the beach life. Painted in non-toxic, lead-free tropical colors of ocean blue, lime green, lemon yellow and tangerine orange; these whimsical plates will add coastal color and fun to your party or table.

Dinner Plates
These pottery plates measures 10.5 inches round and are hand drawn and hand painted with tropical colors and simple wording.  Click on the images for more information.

  Ocean Blue Dinner Plate
 Lime green Surf Dinner Plate
Tangerine Orange Beach Dinner Plate
 Lemon Yellow Swim Dinner Plate

Salad/Dessert/Appetizer Plates

 Surf Camper Salad Plate shown with Ocean Blue Dinner Plate
 Surf Bus Salad Plate shown with Lime Green Surf Dinner Plate
 Surf Woodie Salad Plate shown with Lemon Yellow Swim Dinner Plate
 Surf Jeep Salad Plate shown with Tangerine Orange Beach Dinner Plate

SURF PARTY IDEAS
Ideas for creating your own surf and beach themed parties can be found by clicking on the following two images.


Happy Summer - Party and Enjoy!

Saturday, January 8, 2011

Custom Painted Pottery Portraits

Hand painted pottery portrait
Fresh from the kiln.  

Custom painted pottery portrait  plates.  A keepsake handmade from your photo with personalized names and date make a unique gift for Valentine's Day, Weddings, Anniversaries or as a special plate for those milestone birthdays.  

Each pottery plate measures 10.25 inches round and is hand drawn, hand painted, outlined, coated with a non-toxic, lead-free glaze then fired in my kiln. Food and dishwasher safe - but I recommend hand washing.

Hand drawn portraits are inspired by a photograph.  The image above and below were from a 50th birthday wine tasting tour.

 
Each portrait is a unique piece of art signed by the artist, Cathie Carlson.  The portrait plates can be displayed and used year round and make a wonderful way to commemorate a special day.
I love creating custom pieces, so please don't hesitate to send me your ideas.  You can view more of my custom work and get in contact with me by clicking here  I'd love to hear what you think!

Sunday, October 24, 2010

When two or more friends gather

It is indeed time to celebrate.

LADIES NIGHT OUT:
 A few weeks ago these two ladies ~ whom I met through the close relationship of our boys ~ and who have become almost like family, gathered in my home to step out of their comfort zones, learn a new skill and share my passion for paint.  It turned out to be a delightful evening and gave us another reason to get together to celebrate the great friendships formed within our families.

A glass of wine and a few helpful hints were all that were needed to get the creative juices flowing.

Even though our boys are away at college, they are always close by in our thoughts and conversation.  A testament to this is the design and color selection of my friends wine coolers.  Since all three boys attend the same school we three moms were in agreement on the blue and orange "V" composition of one cooler.

Given the fact that our boys and husbands love the beach and enjoy surfing together, we were greatly pleased by the surfboard design created on the other wine cooler ~ And knew it would be quite the hit with our sons and their fathers.

Obviously, one of us (that would be me) was much too busy talking to have either finished sketching or painting her wine cooler!  Coming from an art teacher who was notorious for saying, "When your mouth is moving, your hands are still" this lack of accomplishment was absolutely shameful.

Fortunately the cooler was eventually finished and fired along with the others.  Now all that was needed to christen the coolers was a reason to chill a bottle and raise a toast.  Which, with our group, is never that difficult.


PRE-GAME "TAILGATE" PARTY:


 This past weekend, the "V" cooler took center stage, along with a few other orange and blue accessories, at our pre-game tailgate party held in the boys apartment up in Charlottesville, Va.  The food and companionship was so good it was hard to tear ourselves away for the real reason behind our gathering:

~ U.VA. FOOTBALL ~

The game kicked off with "Cav Man" parachuting onto the football field for a perfectly executed wahoo landing.  Sending up an enthusiastic roar from the crowd who continued to be astonished as the evening progressed ~

Looking over with amazement as if to say "Seriously, have you seen the score?"

Even the moon peaked up over the stands to make sure what was shown on the scoreboard was, in fact the truth.  Yup - check out the numbers...we were actually in the lead!

It turned out to be a beautiful night and a well executed game ~ Spent in the company of wonderful friends and family members and capped off by a team in great form.

At the end of the evening it truly was a time to give thanks for good plays, fair calls, great friends, and the kinship of family.  We all look forward to a reason to gather and christen the two other wine coolers!

Thursday, June 24, 2010

Summer Art Camp - Girls Week

 This week the theme for art camp was "Happy to be Me".
The artists spent the week creating works of art based around themselves and the activities they love.

Project #1
Portrait Paper Dolls
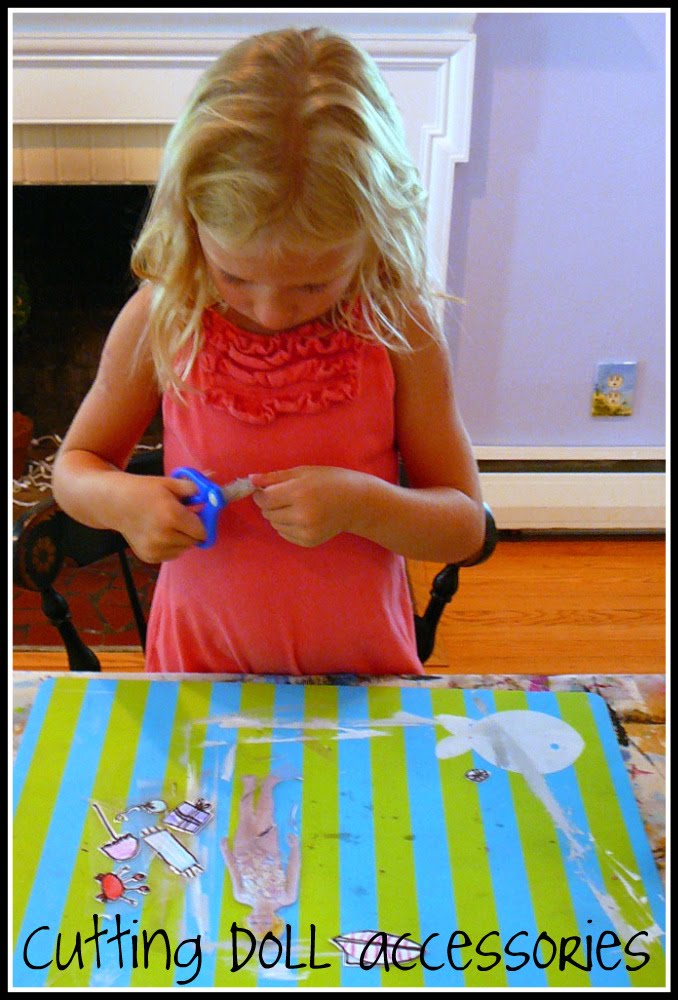
For the first project, I took pictures of the girls posed like a paper doll figure.  The portraits were cut, laminated and used as a pattern for clothing.

The girls decided the theme for their dolls was going to be a beach birthday party. They drew, colored, cut and I laminated accessories for their portrait dolls.

The accessories included birthday cakes, balloons, presents, umbrellas, towels, and beach balls.

 They also made clothing for their dolls that included bathing suits, cover ups and short sets.

Finished Portrait Doll Sets

Project #2
Painted Pottery Portrait Plates

Drawing soccer portraits
 
Proud artists
 
Focused on painting
 
Soccer Girl Portraits

Project #3
Silhouettes

Silhouettes of the girls were drawn onto canvas - they outlined their silhouettes with sharpie

 and painted them with their two favorite colors.

Making Cupcakes :)

A little bit of shell adds to the nutritional value of cupcakes!

 Yogurt makes the cupcakes taste so yummy.

 And a little more moisture to help all the goodness stick together.

Mix everything together, pour into cupcake tins, bake and...

Gobble 'em up!!

 Nothing like a dip in the pool to wash off all remnants of cupcake crumbs and icing!

  And - set up for the art show!